Pixel Lineage Dungeons: Keys, Difficulty and Preparation
Prepare for Pixel Lineage dungeons by matching keys, checking difficulty and modifiers, readying the hero and diagnosing entry or combat failures.
Match the key or material to the exact dungeon entry panel, confirm its cost and difficulty, and prepare a familiar loadout before entering. A key establishes access; it does not guarantee a successful clear.
View reference image
On this page
Treat dungeon entry and dungeon readiness separately
For Pixel Lineage dungeons, first match the entry item to the dungeon panel, then check the selected difficulty and prepare the hero before confirming. Owning a key answers an access question. It does not establish that your equipment, supplies or party can finish the encounter.
The official October listing advertises the Dungeons and Race EVO update, while the developer describes the experience as a deliberately challenging turn-based roguelike RPG. The current source package does not establish a complete, developer-published dungeon table, exact key drop rates or every boss unlock. This guide therefore focuses on preparing and diagnosing an actual attempt, with the incomplete parts called out beside the relevant decision.
For a new hero, follow the beginner route first. Learn the ordinary combat interface on a manageable difficulty before using an unfamiliar entry item. You gain more useful information from a stable baseline than from repeatedly changing class, difficulty and equipment together.
Separate ordinary progression from a keyed dungeon
Players use the word dungeon for several parts of Pixel Lineage. An ordinary adventure selected through Set Out and a particular dungeon requiring an item can have different conditions. The place you see in an older guide may also be an act or raid rather than the current keyed activity.
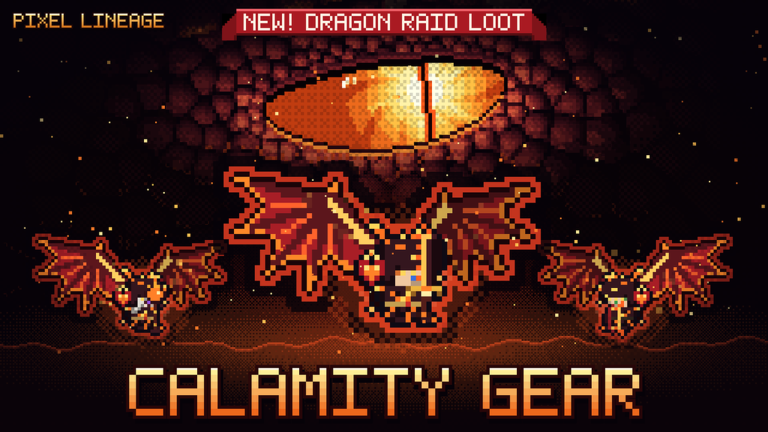
Read the full destination name in the menu. If a guide describes one activity while your panel names another, stop matching instructions by appearance alone. The official promotional artwork also advertises Dragon Raid loot; that artwork identifies a separate advertised content feature but does not provide its complete entry recipe or drop chance.
Write down the exact item name and the destination it says it opens. Check whether the game asks for a key, a different material, a progression condition, or some combination. Avoid assuming that similarly coloured items are interchangeable. This matters when your next goal is race evolution, because an evolution material has a different job from a dungeon entry item.
Read the key before spending it
The October 13 community dungeon summary, linked in the sources, attributes key information to OyO’s October 12 update walkthrough. It reports keys in Normal, Hard and Nightmare progression, and separately connects Blighted Slime with Torment. Those are attributed player reports; they are not a verified drop-rate table or a guarantee that every enemy in those settings can drop the item.
Use that report as a direction for checking your current inventory and in-game loot information. Open the relevant item description, identify its destination, then compare the entry panel. If either screen disagrees with the summary, follow the current game and save the mismatch for a correction.
| Entry check | What you need to establish | Reason to wait |
|---|---|---|
| Destination | Item and panel name the same activity | A guide is describing a different dungeon |
| Consumption | The panel explains what will be spent | The cost or confirmation is unclear |
| Difficulty | Selected setting matches your plan | A remembered selection is too hard |
| Party | Entry conditions fit the actual group | A teammate is not ready or not included |
| Supplies | Intended equipment and usable resources are active | Items are still unequipped or missing |
Do not estimate the cost by subtracting from a screenshot taken by somebody else. Their inventory may reflect a different quantity, difficulty or update. Read your own confirmation and know what you are agreeing to before pressing the final entry control.
Choose difficulty around the purpose of the run
A learning attempt and a material farm need different success criteria. For learning, your goal is to recognise the encounter and understand why an action succeeds or fails. For farming, your goal is repeatable completions with acceptable time and resource costs. A single dramatic high-difficulty clear does not establish the best farm for your account.
Start with a setting you can already handle in ordinary progression, subject to the destination’s actual requirements. Raise one difficulty step only after the same build has produced a comfortable baseline. If encounters already consume most of your supplies, changing the setting before improving the loadout adds uncertainty without answering a useful question.
When comparing two settings, record completed attempts, elapsed play time and the target items actually obtained. Include failed attempts. A faster-looking reward screen can hide preparation and losses from the previous run. This is a measurement method, not a published reward formula or a promised income per hour.
Prepare the hero while you still have menu access
Inspect each equipped item and its effect. Match attack-related bonuses with actions that use them, and read restrictions before assuming an attractive drop belongs in the loadout. Check any available recovery items and the skills you expect to rely on during a long encounter.
Before a coordinated attempt, agree on the basic plan with the party: who is learning, which destination is selected, and whether the goal is observation or a clear. Do not infer formal team roles or enemy targeting rules from the existence of multiplayer. The useful preparation is understanding each other’s available actions and avoiding incompatible assumptions.
A conservative first attempt uses the same familiar class and gear as your baseline run. If you change race, class and weapon at once, a failure cannot tell you which change caused the problem. Reserve an experimental build for an attempt whose purpose is to test that build.
Read modifiers instead of guessing from their names
The attributed update summary lists Elite Patrols, Volatile Enemies, Exhausting Battles and Boss Rush among new or discussed multiplayer options. This guide does not assign invented numerical multipliers to them. Open the live description and identify what each option actually changes before accepting it.
For any modifier, ask three concrete questions: does it change incoming damage, your available resources, or the sequence of encounters? Then check whether the planned loadout still addresses that condition. A resource restriction can matter more to a skill-heavy hero than an enemy health increase, but the displayed rule must establish the restriction first.
If the menu does not show enough explanation, test the option on a low-risk attempt you can afford, or leave it off while learning. Do not treat a modifier as mandatory merely because a farming video selected it. The creator may be optimising a very different character and reward goal.
During a fight, preserve the next decision
Watch attack and defence prompts as carefully as you would in ordinary progression. A familiar enemy at a different setting may expose mistakes that were previously survivable. After a damaging turn, distinguish the cause: failed input, unavailable skill, depleted resource, or an encounter rule you did not read.
Use a recovery action while it can still change the outcome, subject to its actual conditions. Saving every consumable for an imagined final encounter is unhelpful if the current fight ends the attempt. Conversely, spending an important resource on an encounter you can already handle can remove your options later. Make the decision from the live health and resource panels rather than from a fixed sequence copied from a different build.
For bosses, record recognisable prompts and results. This guide does not invent attack rotations or weak phases for unverified bosses. If you cannot identify what caused a loss, capture the relevant screen for your own review and reproduce the condition before declaring a mechanic bugged.
Diagnose a failed attempt before retrying
If entry fails, check the destination, item name, quantity, selected setting and current progression message. Entry failures happen before combat and should not be diagnosed as insufficient damage. If the party cannot enter together, compare each player’s visible requirement instead of repeatedly consuming or rearranging items blindly.
If combat fails, return to one variable. Keep the destination and difficulty stable while improving gear, or keep the build stable while reducing difficulty. If the problem was input timing, practise on ordinary encounters. A fresh key does not fix an unlearned prompt.
Once the dungeon route is reliable, connect its actual drops with a specific upgrade. The race evolution guide explains the matching Heirloom and Heart Blood check. Return to the Pixel Lineage hub for the official experience, dated references and update videos. No dungeon-clear promise, drop percentage or all-boss completion claim is implied by this preparation route.
Step-by-step guide
- Match item and destination
Read the key tooltip and the destination panel together, including quantity, consumption and any displayed progression condition.
- Prepare a baseline loadout
Use equipment and a class you already understand, inspect supplies and coordinate the actual selected activity with the party.
- Diagnose one failure cause
Separate entry failures from combat failures, then change one requirement, item or difficulty choice instead of repeating the same unclear attempt.
Quick reference
Entry versus readiness
| Question | Inspect | Decision |
|---|---|---|
| Can I enter? | Current item and destination requirements | Satisfy the displayed condition |
| Can I survive? | Familiar route, equipped gear and supplies | Choose a manageable setting |
| What changes? | Live modifier descriptions | Read rules before enabling options |
| Why did it fail? | Entry message or combat feedback | Resolve the specific cause |
Video evidence
Watch creator walkthroughs alongside this guide. Check the recording date before following requirements that may have changed.
Pixel Lineages NEW UPDATE! Everything You NEED to Know + FAST Gold Farming!
Compare the castle, run setup and update interface with your own game; creator advice is separate from developer rules.
FAQ
Is this an official developer guide?
No. This is independent fan guidance. Developer descriptions, dated player reports and original planning recommendations are identified separately.
What if the game shows a different requirement?
Follow the current item tooltip, help panel and confirmation message. Send the exact mismatch and date through Contact so the affected claim can be reviewed.
Sources
Recheck these links whenever the game version, release status, or strategy changes.
- Official Pixel Lineage experience Developer identity, genre, early-release warning and in-game controls; reviewed 2026-10-15.
- Official Roblox game API Universe 10767928510, root place 126256942507957 and creator community 362755399.
- Gamezebo race guide, October 13 Attributed report of race passives and matching Heirloom / Heart Blood; conflicting numbers omitted.
- Destructoid Race EVO discussion, October 13 Independent build comparisons and base-versus-evolved distinction.
- Dated first-run player reference Castle, Set Out and Normal learning route; player advice, not official requirements.
- Community dungeon summary, October 13 Attributed key and modifier reports; exact costs and drop rates not established.
- Pixel Lineage Beginner Guide - The BEST Start for New Players! Metadata and public embed availability verified; caption requests returned HTTP 429.
- Pixel Lineages NEW UPDATE! Everything You NEED to Know + FAST Gold Farming! Metadata and public embed availability verified; caption requests returned HTTP 429.